Wood siding can last for years if it is well maintained and properly cared for. Applying a fresh coat of paint every few years will keep your home looking beautiful. Knowing how to properly prepare and paint your wood siding will make the process go smoothly.
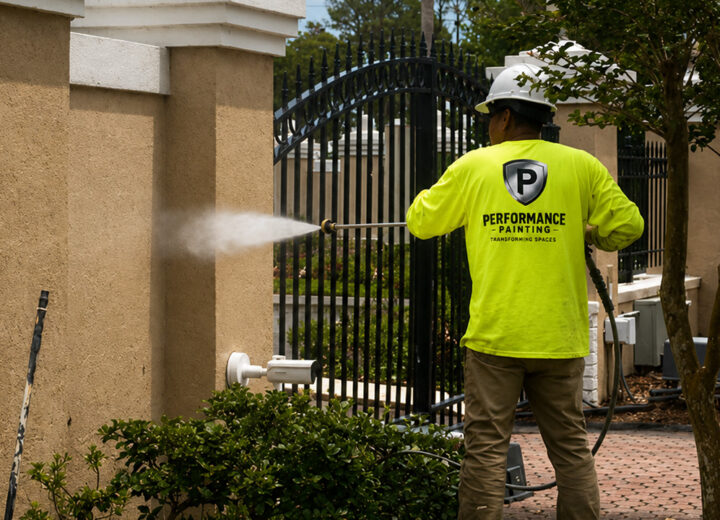
Power Wash the Siding
Adjust the pressure on the power washer to light and gently knock off any dirt or debris that may be attached to the surface of the wood siding. Use a stiff bristled brushed to scrub away anything that may resist coming off. You can increase the pressure of the water as needed, but don’t increase so much that it begins to damage the wood.
Remove Any Loose Paint or Debris
Remove any loose paint or debris using a sanding block or electric sander. If you are using an electric sander, maintain even, yet firm pressure so you don’t gouge the surface of the wood. Depending on the age of the siding, the edges may be a little rough. Sand away any splintered areas and remove any loose pieces of wood that may be sticking out.
Fill Holes and Make Any Necessary Repairs
Use vinyl exterior spackling to fill any holes or gaps. You may need to allow the spackling to dry and apply a second coat to make sure that it is evenly filled. If there are any pieces of siding that are cracked or damaged, now would be a good time to replace them.
Sand and Smooth Patched Areas
Once the spackling has dried, take fine-grit sandpaper and smooth over the patched areas. This will eliminate any bumps or ridges that may have been created during the spackling process. Filling and sanding holes may have to be performed more than once to ensure the hole is completely filled. It’s also important to run the sander over each piece of siding from edge to edge, making sure to lightly sand the sides and edges to eliminate any rough areas.
Apply A Coat of Primer Paint
Once the spackling has completely dried and the area sanded smooth, the next step is to apply a coat of primer paint. If the wood absorbs the paint quickly, you may need to apply one or two more coats to ensure the wood is saturated and the paint fully covers the siding without leaving any bare areas. Allow the primer to dry thoroughly between each coat.
Caulk and Seal Any Cracks
As soon as the primer paint has dried, you will want to check any edges for holes or possible separation. Use a waterproof caulk to fill each hole and create an air-tight seal to prevent moisture from getting underneath the siding. Moisture can lead to black mold. Just like with the spackling, go over each area once or twice to ensure that it is completely filled and sealed.
Apply Exterior Paint
After all of the prep work has been completed, it’s time to apply the exterior paint. You can brush or roll the paint on or you can use a paint gun that will evenly distribute the paint over large surfaces. Taking a small brush and painting around windows, trim, and doorways will make it easy to spray paint the rest of the house. Using slow, steady strokes is the best way to apply paint with both a sprayer as well as a brush.
Properly preparing your wood siding before painting will ensure that the resulting finish will last for several years without peeling or being damaged. Once you have prepared the wood and gathered the painting supply, it will not take long at all to complete the task at hand. When painting any type of exterior surface, including wood, make sure that you allow ample time for the paint to dry.