 Refreshing your interior with a new coat of paint is a relatively simple task, especially if the dry wall is in good condition. But if the dry wall shows signs of damage, repairing it before the actual painting is critical to get professional results.
Dry Wall Repair: Going beyond the Obvious
Dry wall repair may seem fairly straightforward. With the right tutorial, anyone can do it, right? Well, not quite. While a small crack or hole can be repaired in just a few minutes, extensive dry wall repair requires knowledge and quite a lot of work. Since dry wall repair is so important to achieve the desired result, let’s take a look at the most common dry wall flaws and fixes.
- Water damage – In case of extensive water damage, the best solution is to replace the entire dry wall sheet. If the structure of the wall hasn’t been compromised, you can look into dry wall repair techniques. Before attempting to repair dry wall, finding and fixing the source of the damage is important to prevent problem recurrence. Once the necessary repairs have been made, allow the dry wall to dry completely and assess its condition. If there are any water stains, use a good-quality stain blocker to prevent stains from bleeding through the finish paint. To repair superficially damaged dry wall, scrape off the loose layers of paint and topping compound, treat the areas affected by mold with anti-mold solution and let the wall dry properly. Then, apply a quality filler over the repair area, let it dry completely and sand down any bumps with fine-grit sandpaper. If the water-damaged area is soft and spongy, it will most likely need to be replaced.
- Holes – To repair holes in dry wall, choose a quality spackling compound for small holes and joint compound for larger holes. With a putty knife, apply the filler to cover the hole and spread it thin around it. Allow the filler to dry and apply one more coat, without overfilling. After the second coat has dried, use fine-grit sandpaper to smooth the surface. Also, you can use self-adhesive dry wall patches to fix holes up to 6 inches in diameter. If the wall has multiple holes in it, the best thing to do is to replace the damaged section or the entire sheet. To replace a damaged section, cut it down with a utility knife and remove it. Cut a corresponding piece of new dry wall and use screws to attach it to the existing studs. Then, use a quick-drying joint compound to fill in any gaps between the new section and existing dry wall, let the compound dry and sand the surface.
- Hairline cracks – Hairline cracks usually appear at inside corners of walls. In this case, dry wall repair involves applying acrylic latex caulk, which is flexible enough to withstand the movement between adjacent walls.
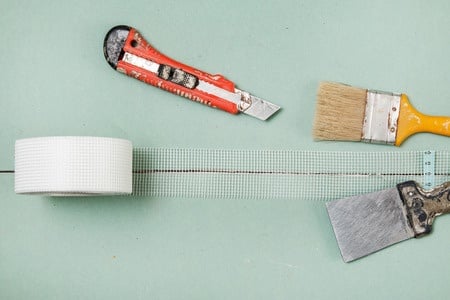
- Loose Tape – Tape bubbling and lifting away from the wall surface is another common dry wall problem that needs to be repaired. Use a knife to cut around bubbles, remove the tape and fill the hole with joint compound. Apply a new strip of tape and cover it with a thin layer of joint compound. After the compound dries out, sand imperfections away.
Proper dry wall repair and preparation before painting is critically important for a professional-looking paint job. If you’ve never completed a dry wall repair project and don’t feel comfortable about tackling the repairs yourself, contact us at Performance Painting. Our professional painters can take care of all of your dry wall repair and painting needs.


