When exterior walls are exposed to rainwater or high humidity, water and moisture can travel through the masonry and affect your internal walls. This means that your walls may stay damp for a long time before drying, which may lead to mold growth and irreparable damage. In humid areas like Florida, wall damage due to water penetration isn’t a matter of IF, but a matter of WHEN.
 How can you prevent water and mold from affecting your walls? By following the next seven steps to waterproofing exterior walls.
- Check walls for faults: Waterproofing external walls is the best solution only if the walls become damp as a result of rainwater or moisture. Before shopping around for waterproofing products, it’s important to eliminate any other causes of structural dampness. It could be anything, from cracks in your bricks or condensation within the wall to a burst water pipe. Once you fix the issue, you can apply a waterproofer as a preventative measure.
- Clean your gutters: The problem with clogged gutters isn’t only that they may flow over the edge, down your walls; they also retain rainwater, which is gradually absorbed by the roof’s wood or fascia boards, potentially leading to a series of problems, including rotten wood, leaks, and mold. You can avoid all these and keep your home healthy by simply cleaning your gutters twice a year.
- Select the right waterproofer: A series of waterproofing products are available today to help homeowners protect their homes from external moisture. Here are a few products you should consider:
- concrete waterproofing coating, which is a cement-like product that adheres to concrete and masonry permanently; it can be applied to any surface, including painted walls;
- silicate-based concrete sealer, which reacts with the ingredients in masonry and concrete to form a waterproofing coating; this sealer can only be used on unsealed/unpainted walls;
- waterproofing paint, which is similar to acrylic wall paint, with the main difference that it delivers better waterproofing performance. It’s very important to choose a breathable formulation that is especially designed to allow walls to breathe and eliminate moisture. The product can be applied to surfaces previously painted.
- Use plaster waterproofing additive: Plastering can help improve aesthetics, make walls more solid, and protect them against moisture ingress. Though most exterior plasters have waterproofing characteristics, you can eliminate water infiltration problems and prevent reoccurrence by simply adding a waterproofing admixture to the plaster.
- Prepare your walls for waterproofing: Irrespective of the product chosen for waterproofing exterior walls, you have to bring your walls in good condition first. This means that you need to use a good-quality filler to repair cracks and patch holes. Allow the filler to dry optimally before grinding. Then sand away rough, uneven areas, remove dust by cleaning the surface with water, and let the walls dry completely to ensure a good adhesion between the waterproofer and the substrate.
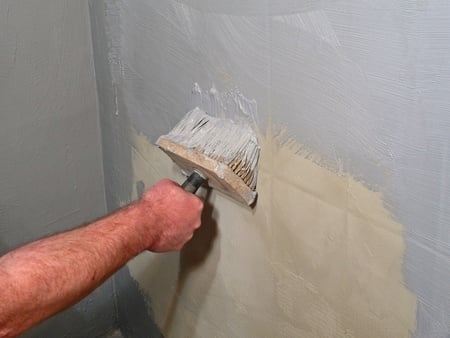
- Apply the waterproofer: You can use a roller or a brush to apply the waterproofer. If a second coat is required, allow the first coat to fully dry and then apply the second coat. Use enough product to create an impenetrable barrier against infiltration.
- Test: Conducting a water-tightness test is very important to evaluate the effectiveness of the products used for waterproofing exterior walls. For this test, water should be sprayed on the wall surface for a couple of hours, keeping the nozzle at a 30-degree angle. Your home will pass the test only if a moisture meter shows there is no moisture. By waterproofing exterior walls, you’ll not only prevent serious damage but also boost the value of your home.